If a Property Owner's listing is rejected, part of the listing fee can be refunded. This article explains when you can ask and how.
This article is for Property Owners.
When a refund is possible
Situation
What you can do
Your listing was rejected and you can still fix it
Fix it and send it again, or ask for a refund instead.
Your listing was permanently rejected (rejected the maximum number of times)
A refund is opened for you automatically. You only need to give your bank details.
A refund is not offered once a listing has been approved and gone on the website.
How much is refunded
The refund is partial, not the full fee. The amount is decided by our finance team when they review your request, and each request is looked at individually. Until then your listing's page shows "Will Be Decided After Finance Review".
See the Refund & Cancellation Policy, linked at the bottom of every page of the website.
Option A: Ask for a refund instead of fixing the listing
Important: This can't be undone. Once you ask for a refund, you can no longer edit the listing or send it again.
Open the rejected listing from All Properties or Rejected Properties.
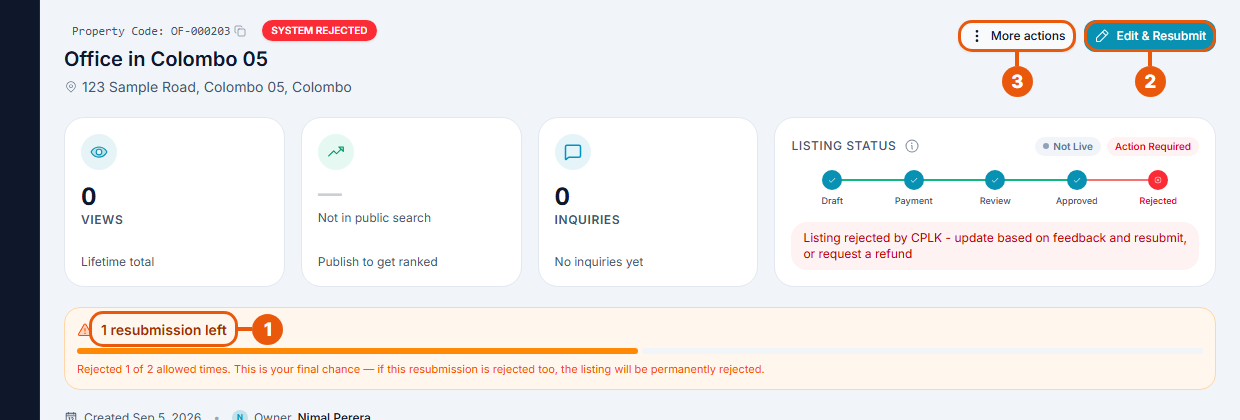
Resubmissions left: how many more times you can send the listing.
Edit & Resubmit: fix the listing and send it again. See Handling Rejected Listings.
More actions: open the menu to ask for a refund.
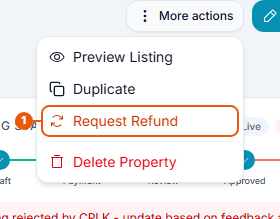
Click Request Refund.
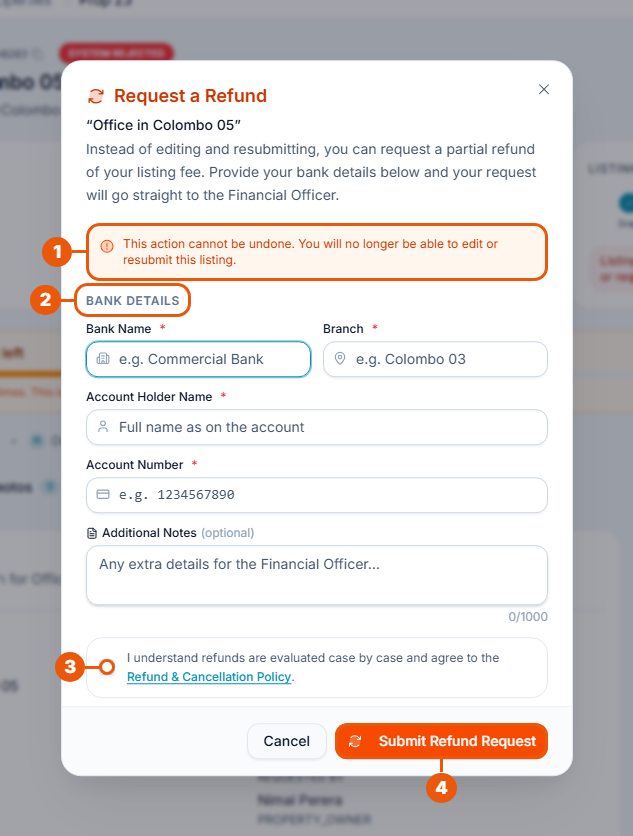
Read the warning.
Enter your bank details: bank name, branch, account holder name and account number. Add a note if it helps.
Tick the box to agree to the Refund & Cancellation Policy.
Click Submit Refund Request.
Your request goes straight to our finance team.
Option B: Your listing was permanently rejected
A refund request is created for you. You must add your bank details before it can be processed.
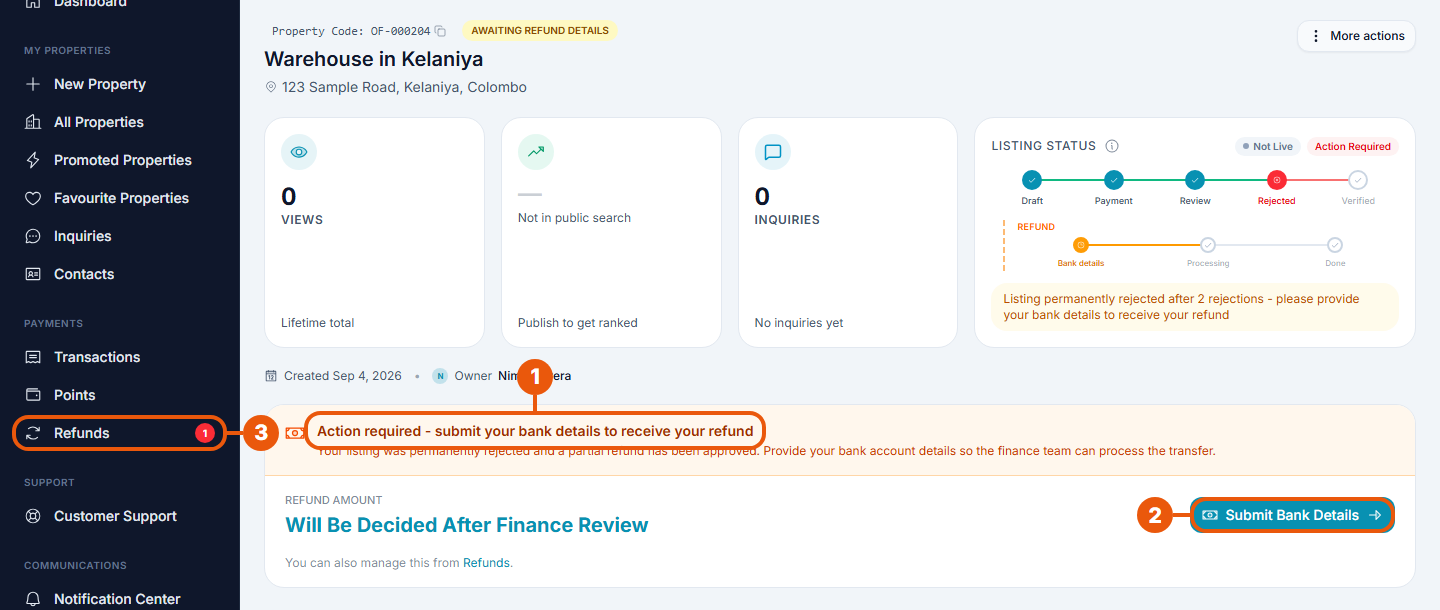
Action required: the notice asking for your bank details.
Submit Bank Details: open the form.
Refunds in the side menu: the red number shows how many refunds are waiting for you.
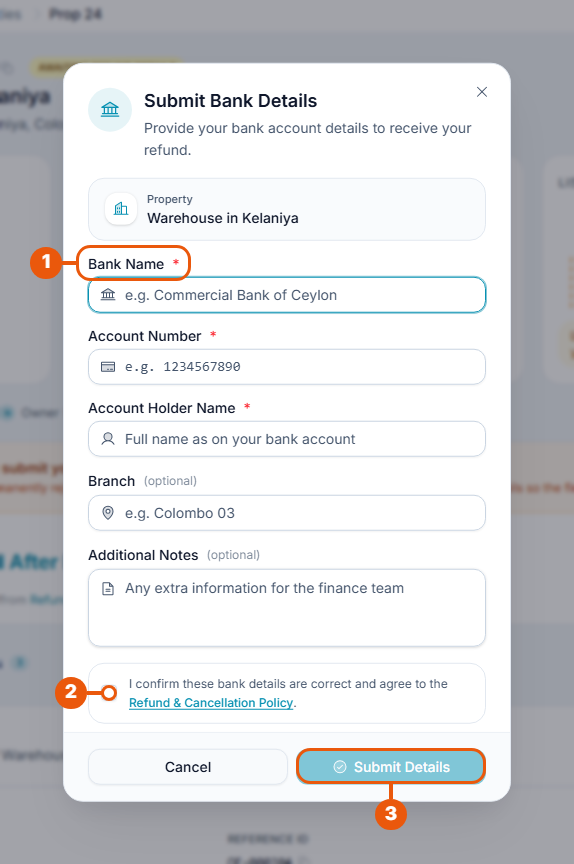
Enter the bank name, account number and account holder name. The branch and notes are optional.
Tick the box to confirm the details are correct.
Click Submit Details.
You can also do this from the Refunds page. See Refund Process and Tracking.
Getting your bank details right
Use the account holder's name exactly as the bank has it.
Check the account number twice. A wrong number delays your refund.
If you spot a mistake while the request is still being reviewed, open the Refunds page and click Update Bank Details.
What happens next
Our finance team reviews the request and transfers the refund to your bank account. See Refund Process and Tracking.
Related articles
Was this article helpful?
If you still have questions, our support team is here to help.
Submit a Support TicketNot signed in? Sign in first
