20.6 Managing Help Centre Categories
Help articles are grouped into categories, such as "Getting Started" or "Payments & Plans". The Super Admin manages them.
The categories in these pictures are examples only.
The categories page
Click KB Categories in the side menu.
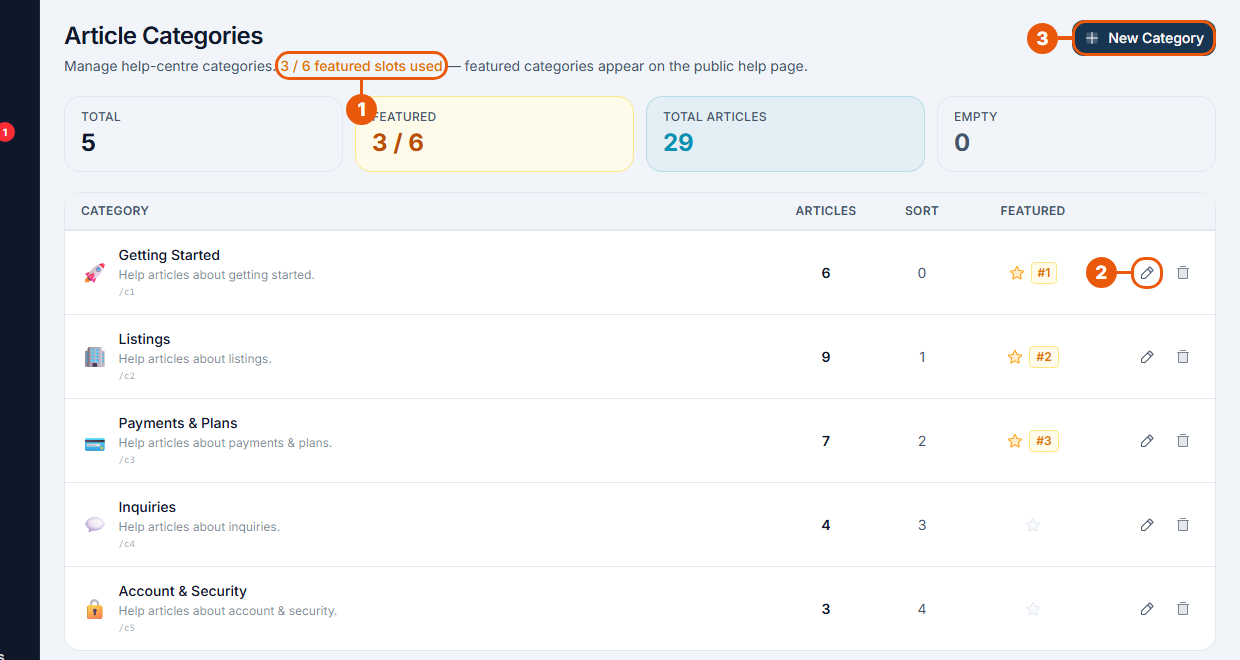
Featured places used: how many categories are featured on the Help Centre's main page, out of the number allowed.
Edit (pencil): change a category. The bin beside it deletes the category.
New Category: add a category.
Each row shows the category's icon, name, description, how many articles it holds, its sort order, and whether it is featured (with its position, such as #1).
Adding or changing a category
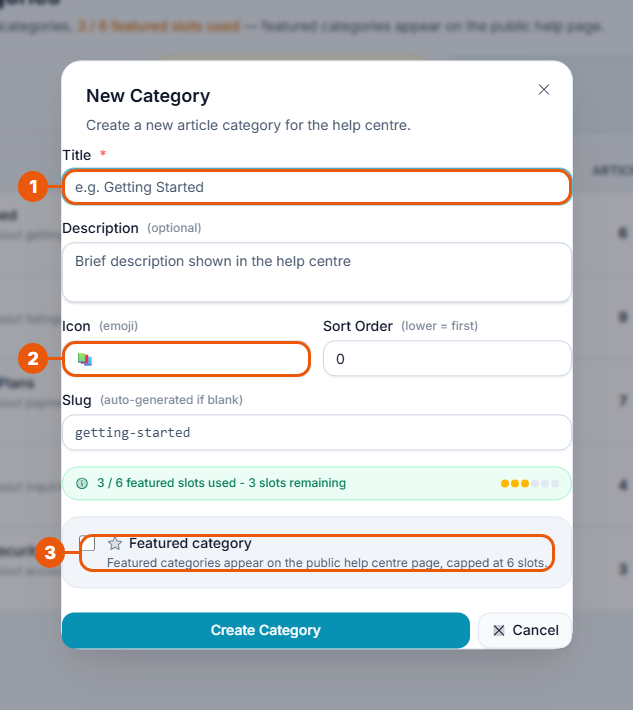
Title: the category's name.
Add a short description if you like; it is shown in the Help Centre.
Icon: type or paste one emoji, for example 🚀.
Sort Order sets the category's place; lower numbers come first. The slug (the end of the web address) is filled in for you if you leave it blank.
Featured category: tick to show it on the Help Centre's main page, and choose its position.
Click Create Category (or Save when editing).
Featured categories
Only a limited number of categories can be featured at once (6 at the time of writing). The window shows how many places are left. To feature another category when all places are used, remove the featured mark from one first.
The number of places can be changed in System Config. See System Configuration.
Deleting a category
Click the bin and confirm. Move the category's articles to another category first, so readers can still find them.
Related articles
Was this article helpful?
If you still have questions, our support team is here to help.
Submit a Support TicketNot signed in? Sign in first
