Your agency's team members are the people who can sign in and work on your listings. This article shows how to add people, change their role, and take away their access.
Who can do this
Agency Super Admin: can add members, change roles, sign members out and deactivate them.
Agency Admins can open the members list, but changes are made by the Agency Super Admin.
The roles
Role
What they can do
Agency Super Admin
Everything, including the plan, payments, approving listings and managing the team
Agency Admin
Manage listings and inquiries across the agency
Agent
Create and manage their own listings and answer their inquiries
The Agency Members page
Click Agency Members in the side menu.
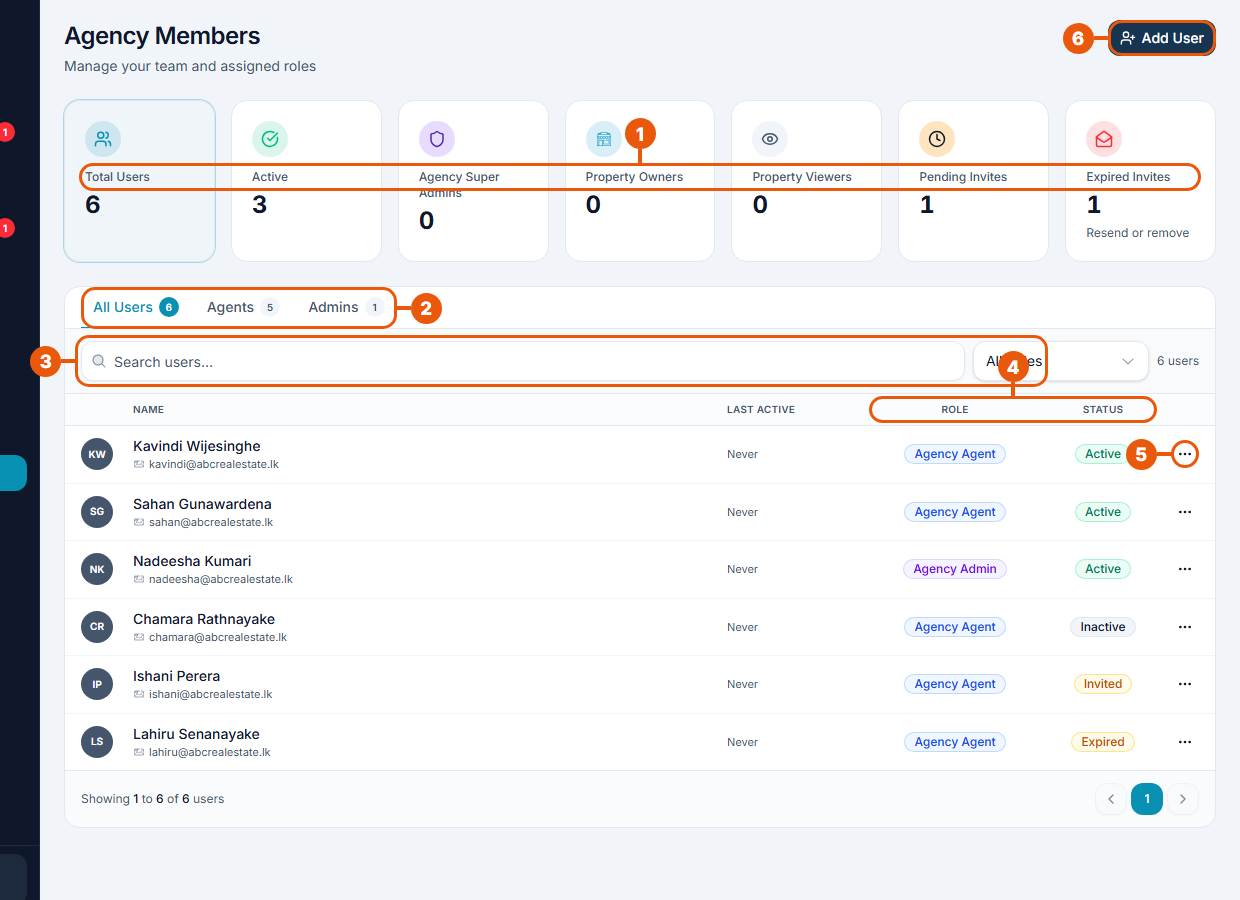
Summary cards: how many members you have, how many are active, and how many invitations are waiting or have expired.
Tabs: All Users, Agents or Admins.
Search and filter: find a member by name or email, or show one role.
Role and Status of each member.
Actions (…): what you can do for that member.
Add User: invite someone new.
Status
Meaning
Active
Can sign in and work
Inactive
Deactivated; can't sign in
Invited
Invitation sent, not yet accepted
Expired
The invitation was not accepted in time
Adding a member
Click Add User.
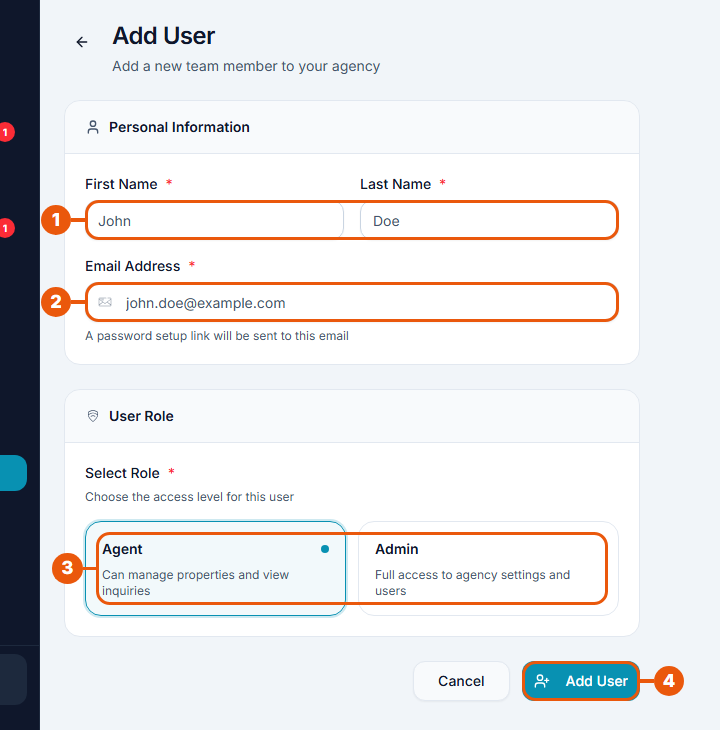
Enter the person's first name and last name.
Enter their email address. They'll receive an email with a link to set their password.
Choose a role: Agent or Admin.
Click Add User.
The person appears in the list as Invited until they accept. See Accepting an Invitation.
What you can do for a member
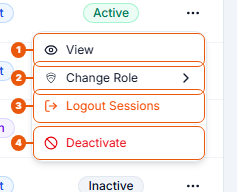
Click … at the end of the member's row.
View: open the member's details.
Change Role: make them an Agency Admin or an Agent. You're asked to confirm.
Logout Sessions: sign the member out on every device straight away. Use this if a phone or laptop is lost. You're asked to confirm.
Deactivate: stop the member signing in. See below.
You can't use these actions on your own account.
Deactivating a member
When someone leaves, deactivate them. Their listings and inquiries must go to someone else.
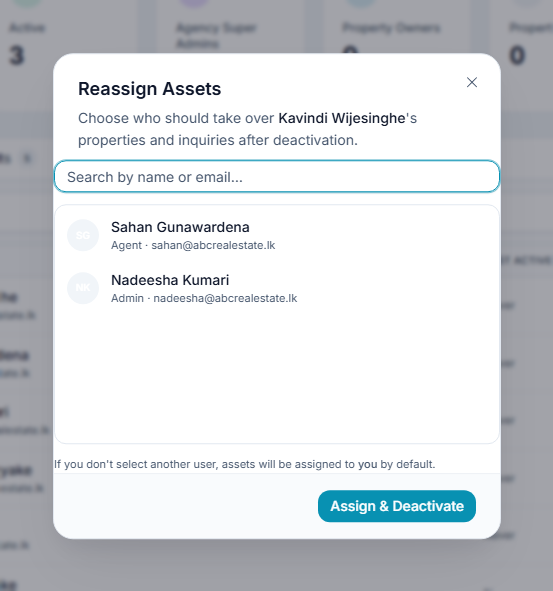
After you click Deactivate, the Reassign Assets window opens.
Click the team member who should take over the person's properties and inquiries. If you don't choose anyone, they come to you.
Click Assign & Deactivate.
The person can no longer sign in, and their status changes to Inactive.
To let them back in later, open … and click Activate.
To move only some listings, see Moving a Listing to Another Team Member.
Invitations that haven't been accepted
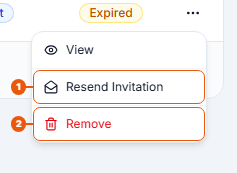
For a member marked Invited or Expired, the … menu offers:
Resend Invitation: send the email again.
Remove: cancel the invitation. You're asked to confirm, and it can't be undone.
Remove is only offered for invitations. Members who have already joined are deactivated instead.
Related articles
Previous Article
17.1 Managing Your Agency Profile
Next Article
17.3 Members Activity: The Agency Activity Log
Was this article helpful?
If you still have questions, our support team is here to help.
Submit a Support TicketNot signed in? Sign in first
