In the first step you say what you're listing and where it is.
Choose the listing type and property type
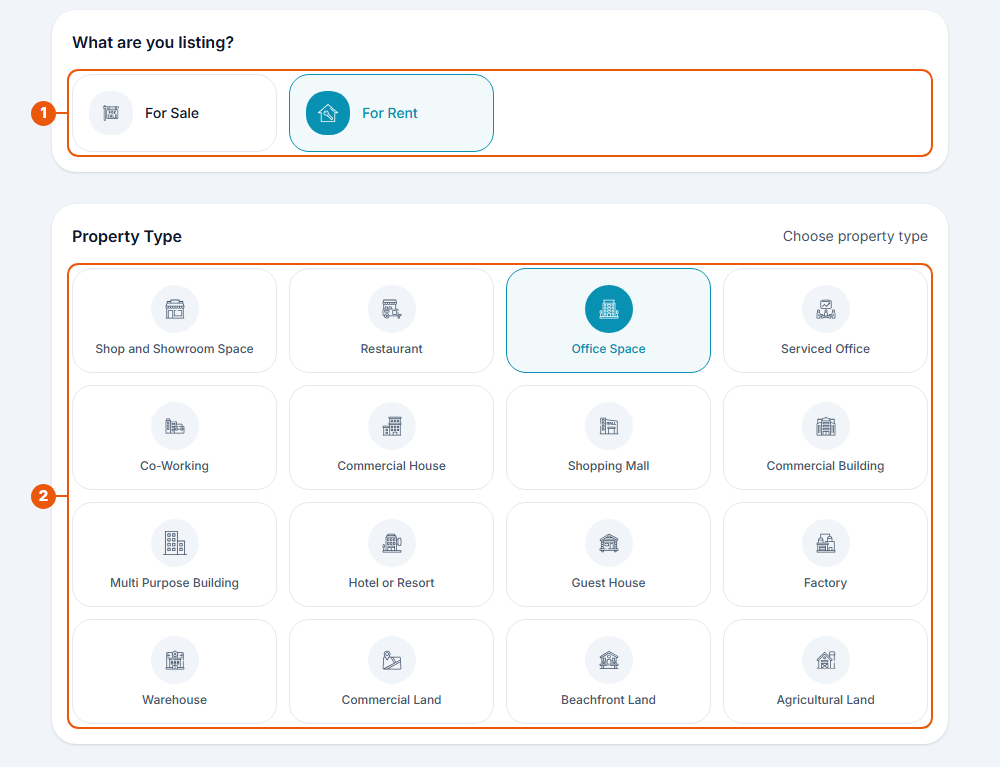
Under What are you listing?, click For Sale or For Rent.
Under Property Type, click the type that fits your property. The one you choose is highlighted.
Not sure which type to pick? See Property Types & Listing Types.
Enter the location
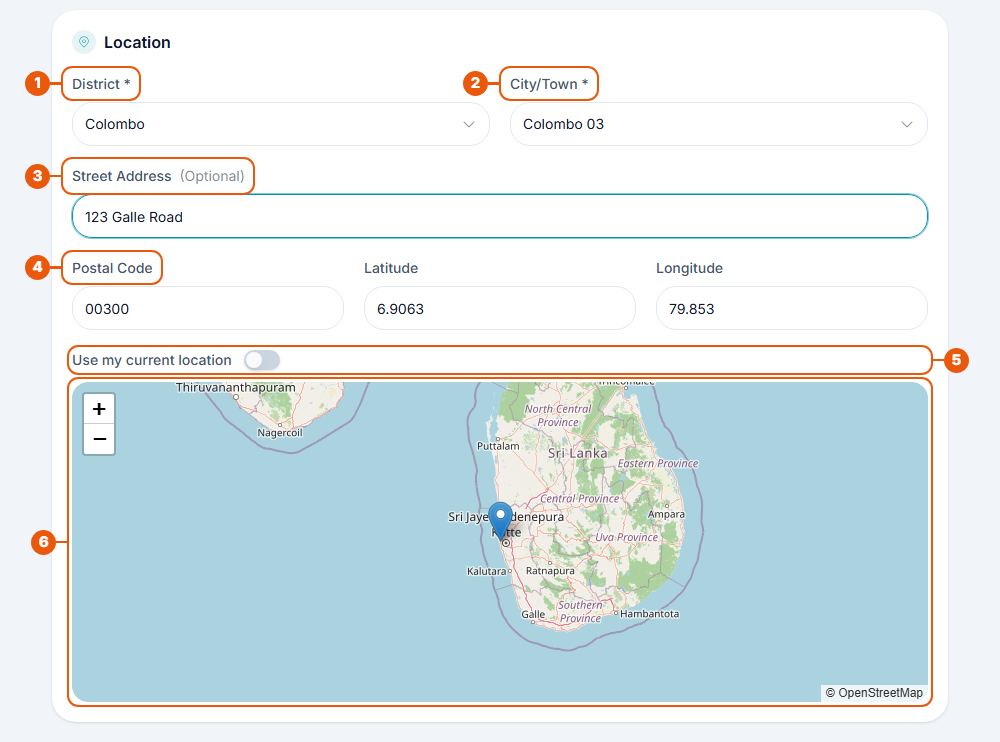
District (required): choose the district from the list.
City/Town (required): choose the city or town. The list shows the places in the district you chose.
Street Address (optional): type the street name or a nearby landmark. It helps people find the property.
Postal Code, Latitude and Longitude: filled in for you when you choose the city. You can change them if they're not right.
Use my current location: switch this on if you're at the property. Your device may ask for permission to share your location.
Map: shows where the pin is placed.
Continue
Click Continue to Details at the bottom of the form.
Once you've chosen the listing type, property type and city, your listing is saved as a draft. You can leave and come back to it later. See The Listing Form.
Common messages
Message
What to do
"Please select a listing type"
Click For Sale or For Rent.
"Please select a property type"
Click one of the property types.
"Please select a district"
Choose a district from the list.
"Please select a city"
Choose a city or town from the list.
Next step
Previous Article
6.3 The Listing Form: Overview, Drafts and Saving
Next Article
6.5 Step 2: Property Details
Was this article helpful?
If you still have questions, our support team is here to help.
Submit a Support TicketNot signed in? Sign in first
